Imagineer Systems’ mocha Pr
Mocha Pro has worked its way into the visual effects and post-production world in a big way. If you doubt me, then you can probably take it up with the Oscar they were granted from the Academy of Motion Picture Arts and Sciences for technical achievements. I mean, that’s gotta count for something. But they don’t need that gold statue to prove their value. It’s all there in the work that is done with mocha Pro.
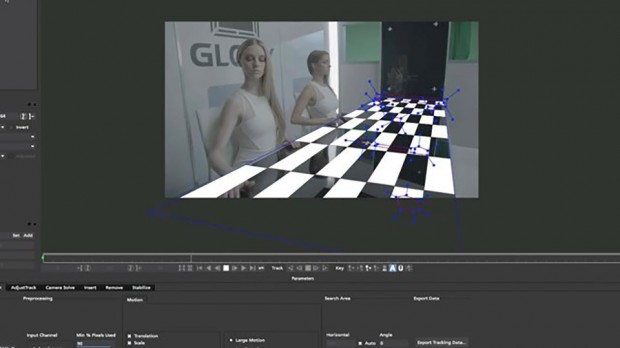
Mocha is, at its foundation, a planar tracker, which means that it tracks patterns in footage that lie on a particular plane – like a television screen. But if you look around you, almost everything can be broken down into flat planes, and that’s what mocha looks for. You then can take that tracked data and make magic.
The latest iteration mostly has support for working in stereoscopic 3D. If you work on stereo shows, you know that there is footage for each eye – each being slightly different. Can you imagine trying to do tracking or rotoscoping for one eye, and then doing it manually for the other? And make it match? Neither can I. Mocha Pro 4 takes its tried and true tracking system and extends it to both eyes at the same time, taking into consideration the offset between the eyes. Any change that you make to rotoscoping or remove functions happens in the other eye. Or not. You have the ability to turn it off if you want. All of the stereo tracking and spline data can be exported to stereo-supported software, such as Nuke.
If you don’t do stereo projects, you still get some new stuff though, including full export to Nuke nodes, a streamlined UI, custom key assignment to tailor the workflow to you, and even exporting your roto to Premiere Pro (although I hardly condone handing over the compositing reigns to editors). And finally, Python has been brought into the system, elevating a fantastic piece of software to a fantastic piece of software that can now be incorporated into a larger pipeline with custom tools – a critical factor when talking to larger visual-effects houses with intense infrastructures.
If you have After Effects, then you have (and are probably familiar with) mocha. If you haven’t done so already, the pro version is worth the $500. And if you are using Nuke, you’ll love the new export tools, but you’ll love even more MochaImport+ for Nuke. For more on that, read on.

Mamoworld’s MochaImport+
MochaImport+ is a suite of tools known for creating a workflow between After Effects and mocha Pro. But with small and medium-size effects houses beginning to move to Nuke, it was apparent that the tools needed to be available. Mamoworld has stepped up and created a suite of tools for Nuke users to take advantage of the strengths in mocha Pro.
All the tools use as their foundation the mocha Pro planar tracker to drive their functions. CornerPin+ and Tracker+ are more robust nodes of the same name, using not only the position, rotation and scale of the trackers, but also the shear and perspective of the plane from Mocha, which adds that subtle dimension to tough tracks that you just can’t get from point trackers.
The Roto+ and RotoPaint+ work with the Mocha tracking data and multiple trackers, which means that in Nuke there are individual splines within the one node that could be tracking objects moving in completely different ways. Any roto or paint that you apply a particular spline will be locked to only that spline, keeping your Nuke scripts clean and efficient.
But my favorites are the Stabilize+, GridWarp+ and SplineWarp+ features.
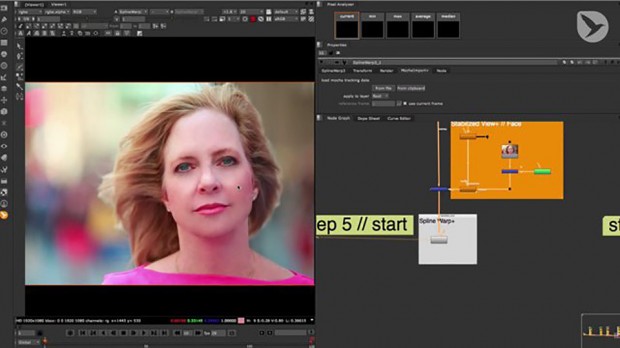
Stabilize+ takes the Mocha data, and then make a little Nuke flow that brings in your footage, and applies stabilize to it. You then apply your effects to the stable footage. And then a final node returns the footage to its original state – but now with the effects. The process is something I use all the time and this tool makes it so easy.
SplineWarps and GridWarps are fantastic tools, but can be cumbersome with moving footage – and what footage isn’t? SplineWarp+ and GridWarp+ take the mocha data and apply it to the warp so it follows the thing you are warping (like maybe the Mad Hatter’s eyes). The transforms are applied to the underlying matrix of the warp, rather than to the points, so you can actually add animation on top of the tracked warp. The black arts, I say.
Some may say, “Well, I can do that in Nuke already with tools already available, why buy another tool?” The answer is: to make it a simpler workflow. Yes, you can act all smart and build node trees to do much of this. But outside of feeling smart, where does that put you? It puts you behind the compositor who used the Mochaimport+ tool to streamline the process. Instead of spending time building a node tree, that artist is already doing the art.
At $123, I’d say the investment is worth exponentially more than the time investment in building the Nuke nodes every time you need them.
And just because MamoWorld is a standup company, they added a bonus. They throw in a free tool that lets you re-path your Nuke sources for easy migration from, say, a directory structure on the freelance artist’s home machine and the one at the studio who contracted him.

Autodesk’s 3ds Max Extension Park 2015
You may look at 3ds Max’s extension pack for 2015 and think, “Huh, that’s not so much.” But the number of features in a release hardly reflects the importance of those features.
Let’s look at OpenSubDiv. For those of you who don’t know, subdividing models is a common function in a 3D pipeline. So common, in fact, that it is quite possibly part of every CG character in every CG film you’ve seen in the last 15 years. It’s important. But just dividing polygons on models isn’t as simple as it sounds. There is a lot of math going on. And, who else better to tackle the issue than Pixar. In fact, I first remember hearing about polygon subdivision around the time of Geri’s Game, and it just grew from there. Well, Pixar made their technology open source — in the form of OpenSubDiv, which Autodesk has picked up and incorporated into their DCC suite. Mudbox and Maya got it first and now, finally, 3ds Max.
Basically, OpenSubDiv allows one to take a low-polygon mesh and apply a smoothing process to it to make it appear as if it had more detail. In the past, 3ds Max had Turbosmooth (and still does), but that process has its limitations and can frequently cause artifacts if your base model isn’t created properly. Now, while you still need to be aware of proper modeling techniques, OpenSubDiv alleviates the need for unnecessary edge loops to control detail. Along with the OpenSubDiv modifier, there is the Crease Set system that allows you to define how sharp edges will become when the model is subdivided. So, you can have really soft, rounded edges, all the way to absolutely sharp corners. And, because you can establish crease sets, you can control many edges at the same time. And best of all? These parameters will migrate nicely to Maya and Mudbox, so that interchangability is less of a problem.
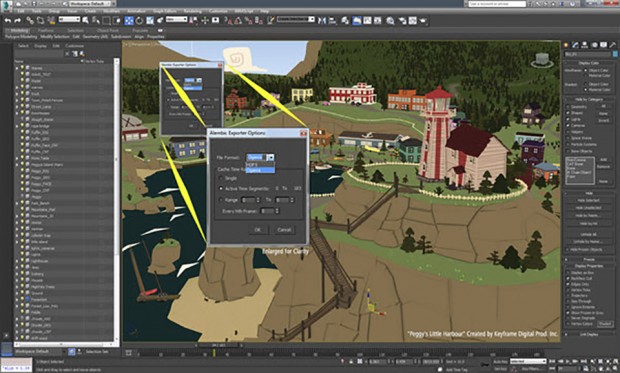
And speaking on interchangability, 3ds Max now supports the Alembic interchange format that is all the rage these days. Developed from some of the big boys in the industry, like ILM and Imageworks, Alembic is designed from the get-go to manage and retain model, animation and simulated data and have it move between 3D platforms with little to no difference. Exocortex released a plugin for Alembic support for Max a few years ago, but now the feature is built into Max through the latest extension (which means it’ll be incorporated into Max 2016.)
Lastly, and not least, for the real-time and gaming people, ShaderFX has been expanded with more shading options, additional procedures, and a fancy interface that looks like the Material Slate already in Max. But even better, the interface is mirrored over to Maya so that the user experience is the same between the systems.
So, again, it’s not a lot of features, but it is some pretty significant ones. Kinda like the choice of buying the lame fireworks multipack with sparklers and ground bloom flowers when really you want a two or three huge rockets that are illegal in most counties.


 Win a Funko X Lilo & Stitch Prize Pack!


