Foundry’s Nuke 12
Last month, Foundry released version 12 of their flagship, Nuke. And there is some pretty groovy stuff in it. So, with minimal preamble, let’s dive in.
The most robust addition into the Nuke environment is migrating CaraVR nodes. CaraVR, for those of you not in the know, was Foundry’s answer to virtual reality 360 camera workflows. There are a lot of processes that are at least more difficult, if not unique to working with VR. Unique is stuff like seamlessly stitching together multiple cameras. More difficult would be dealing with extreme lens distortion along with painting out stuff and rotoing. The distortion and camera solvers are actually even stronger than the Nuke-centric versions. These used to live in CaraVR, but CaraVR will no longer be a thing, and all of the tools will migrate to Nuke.
Foundry’s response to the context-aware fills in Photoshop and After Effects is a new InPaint node: Paint strokes will intelligently use surrounding information to blend over whatever you are trying to remove. The tool remains “live,” so that you can make adjustments like transforming the sampling area to get a better result. Because the fill remains temporally active as well, the result will change and match during subtle light and shadow changes.

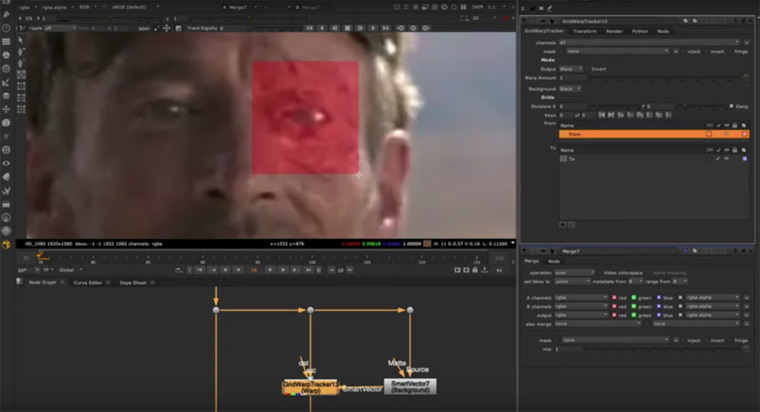
Combining GridWarp and a Tracker ends up with a GridWarpTracker (duh!). This is incredibly powerful stuff which uses the magical Smart Vectors for tracking surfaces and patterns that distort, and then puts a grid warp that follows the track on top. Then, you can put adjustment layers on top of that! You end up with a non-destructive, versatile workflow for tracking and artistically adjusting patches for beauty work, digital prosthetics, practical makeup enhancements, logo removals, etc.
A seemingly small addition, but absolutely ubiquitous in the compositors’ toolbox, is the Edge Extend. Simply put, edges are a big thing, and they are a pain when keying. So, the workflow is to erode the edge some, and then pull pixel values back out from the inside of the shape, this is then pre-multiplied against the matte — and voila, no halos. At least, that’s the idea. There are plenty of home-grown methods as well as gizmos on Nukepedia. But this one is optimized, compiled code and GPU accelerated.
For the 3D side of things, Nuke 12 has soft selections for geometry. Now, I wouldn’t want compositors to go in and modify geo as a common practice, but just in case you need to tweak to match a silhouette better, or even more often, adjusting meshes to catch environment projections, this is much better than pulling verts.
For the technical users and directors, Foundry has implemented a way to maintain OCIO color spaces and establishing defaults for different types of inputs to ensure that the compers are in the correct color space. It can also be customized to the show that artists are working on. I say the less the artists don’t have to worry about color science, the better.
To cap off the release: The engineers have tinkered under the hood to optimize UI response, keeping things spry with thousands of nodes, and media playback for resolutions that just seem to be getting bigger.
Website: foundry.com/products/nuke
Price: $1,629 (rent per quarter); $4,758 (buy)
Reallusion’s Cartoon Animator 4.0
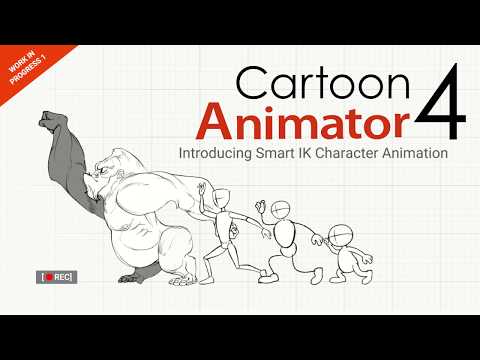
Reallusion’s Crazy Talk Animator has evolved into Cartoon Animator 4.0, keeping all the cool tech from the webcam-driven animation and skeleton-based puppet-driven rigs, but bolstered up with tools to refine the process.
With the base Cartoon Animator and the Motion LIVE 2D plugin (which you can purchase in a bundle), you get a capture system that drives the animation of your character in real time, which includes voice recording and lipsync. You can use either a dedicated webcam, or an iPhone X or greater, which then utilizes the depth capabilities of the camera for even more fidelity. The motion capture transfers blinks, brows, nose scrunches, whatever, and if its mapped to the character, it’ll follow along. It’ll even do head turns if the character is set up with the 360 head creation (see below). In addition, motion can be propagated to upper body movement to enhance the action. The amount of influence the motion capture has on the animation is something that can be dialed in for more subtlety or exaggeration, depending on your goals. If you need more overlapping animation, you can turn on a secondary “breathing” idle animation.
While prepping your character, the tool allows you to build a 360-degree version, so that when you have head turns or looking up and down, for example, you can customize the looks from those angles — almost like setting keyframes. Then, when you drive the animation with the motion capture, you’ll have fluid perspective changes.
This can be recorded and edited later, or, you can livestream through tools like OBS, XSplit and FFsplit directly out to services such as Twitch, YouTube and Facebook Live. What a world we live in!
We have seen many skeleton-based animation rigs before, but CA4 has added “Smart” IK systems to provide ways to switch between IK effector-based animation with FK systems, compounded with locking mechanisms to plant feet and hands. This works not only with footsteps and such, but you can always include props. All of this can be transferred to other, similar, but disproportionate characters. The retargeting adjusts the animation so that the feet and hand locks still work properly.

With a Photoshop to Character Animator pipeline, you can bring your characters from a layered PSD, and CA4 will be able to auto-rig standard character types. Even if you have a unique character than doesn’t abide by typical templates, you can rig up the character, and then take a snapshot, which CA4 will make into a UI controller. Now that’s fancy!
In its nascent form a few years ago, the technology was still rudimentary and rough, but you were able to create a lot of content quickly. Now, as the tech matures, and more artists have been giving feedback, the results are getting better and better. Character Animator 4 bundle with the Motion LIVE plugin and the Photoshop pipeline runs about $300, which in my opinion, isn’t bad compared to what you get out of it.
Website: reallusion.com/cartoon-animator
Price: $199 (Cartoon Animator 4); $229 (Facial Mocap Pro); $299 (Facial Mocap Bundle); $369 (Facial Mocap Essential Bundle); $$99 (Facial Mocap Core Bundle)
Ziva 1.6 and 1.7
We didn’t get to cover the Ziva 1.6 release, so this is going to be a combined view of both versions 1.6 and 1.7 of a rigging system that has been picked up as the go-to plugin by many big VFX houses such as Sony Imageworks, DNeg, Image Engine, Scanline VFX, MPC and Method Studios.
Ziva 1.6’s primary claim to fame is the inclusion of what they call ZAT, or Ziva Anatomy Transfer. You see, rigging isn’t for the faint of heart. Frankly, it gives me anxiety. When you have to rig a pack of wolves or a pride of lions, with animals varying in different sizes and proportions, the idea of establishing unique muscle simulation rigs is at the very least daunting, and quite possibly untenable.
ZAT takes the source muscle system and uses deformers to fit the system into the new creature, while maintaining the relationship, contact points, etc. Python-based tools transfer the attributes from the original. Through the Ziva menu, there are numerous toolsets for management of the ZAT functions. If this sounds like it might have a learning curve, well, Ziva provides two highly refined examples for subscribers. Zeke the Lion and Lila the Cheetah can be used as a test-bed for getting up and running and better understanding the process.
Ziva 1.7 adds to the list of tools a way to artistically control muscle shapes, called Art Directable Rest Shapes. For the most part, much of Ziva is based on simulation. Muscles and tissue retain volume while activating, sliding on one another, and extending and compressing. But in reality, muscle systems are just as unique from person to person or creature to creature as fingerprints. They are basically similar, but there are subtle differences. On Black Panther for example, we had Chadwick Boseman, Michael B. Jordan and their stunt doubles go through a series of movements so we could see how their muscles behaved and looked in certain poses.
Art Directable Rest Shapes | Ziva VFX Tutorial from Ziva Dynamics on Vimeo.
At that time, we weren’t using Ziva, but if we had been, we could have tweaked the muscle systems to get their CG digital doubles to roughly match. With Ziva 1.7, we would have looked at the specific shapes, extracted the muscle in that position, and then sculpted the difference into that pose position. Ziva would then be able to hit that look when an arm or a leg was in that pose. This would get us even closer to matching the live-action counterparts.
Of course, this isn’t just for photorealistic stuff. Cartoony animation needs custom muscle sculpts even more than the realistic kind. Frequently, animation is squashing and stretching well beyond what is “real” or natural, and the structures underneath the skin have to abide. The ADRS give the artists the control to customize those forms.
It’s apparent that the folks at Ziva are passionate about rigging, and they want us to be just as excited — so we can go out at create amazing creatures and characters. For students and educators, the license is a mere $60/year. The indie version is $50/month, which sounds expensive, but if you can rig up a character in days instead of weeks, that is well worth the price of admission.
Website: zivadynamics.com/resources/ziva-vfx-1-7-overview
Price: ($60-$95 (VFX Batch Short-Term), $600 per year (VFX Batch); $1,800 per year (VFX Studio), $8,800 (Ziva Humans Film Studio), $10,000 (Gala the Horse)
Todd Sheridan Perry is a VFX supervisor and digital artist whose credits include Black Panther, The Lord of the Rings: The Two Towers and Avengers: Age of Ultron. You can reach him at todd@teaspoonvfx.com.


 Win a Funko X Lilo & Stitch Prize Pack!

