Adobe Substance 3D Painter
The latest edition of Adobe Substance 3D Painter has some pretty exciting new tools. Earlier in the year, there was a release that revamped the UI and workflow with even more emphasis on interconnectivity within the Substance tools as well as its new Adobe siblings. But in the latest version, the release of the 3D Warp Projection is pretty phenomenal.
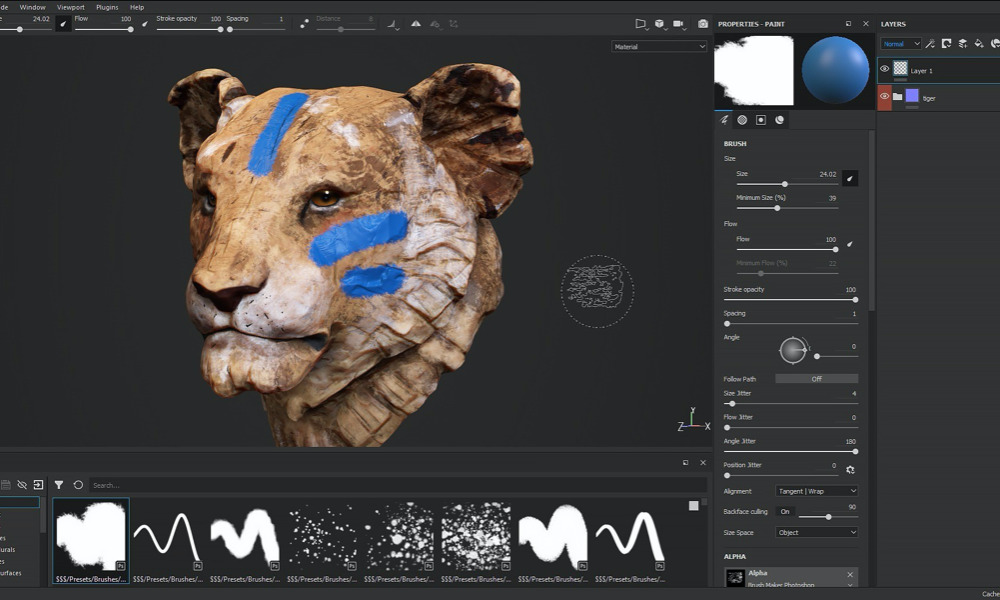
Setting up UVs is no fun, even for people who tell you setting up UVs is fun. It’s time consuming and artist resource intensive. Part of that is because you are constantly going back and forth between the 3D model and its 2D unwrapped version. Substance 3D Painter’s Warp Projection combines those into an intuitive workflow where you are manipulating the texture on the surface of the model.
You can start with an initial planar projection (or the new cylindrical projection) with a minimum of control points. You move them into a rough position on the model, and then you can snap the control points to the surface of the model — with the ability to further rotate the points so they match better to the normals of the surface.
Your first pass is to get a nice distribution of the texture across the surface, and then you can begin to subdivide in order to get finer control points. Just like rotoscoping, there is a balance between an economy of vertices and the amount of detail you need. Especially for surfaces with a lot of contours and details like a human head or hands, you want enough points to ensure lining up the nasolabial folds on the face, or the wrinkles on the knuckles.
To avoid making your warp too dense for the sake of accuracy in specific areas, you can layer additional warp projections on top of broader warp projections. By cropping the texture and then using the mask features in Substance 3D painter to isolate the area, you can create a smaller and tighter wrap projection just in those areas you need.
It’s a great tool for repurposing textures on similar models that may have a totally different UV distribution, and you’d just rather not re-UV the model. I have a feeling that it’s one of those things that you will look back and wonder how you did things before without it!
Website: adobe.com/products/substance3d-painter
Price: Starts at $19.99 per month (Substance 3D Texturing);
$39.99 per month (Substance 3D Collection)

Adobe Premiere
Adobe Premiere also received some development love this year. Yes, I hear you — the many minor updates that happen throughout the year make it difficult to know when something major has changed, but there are definitely some significant steps up.
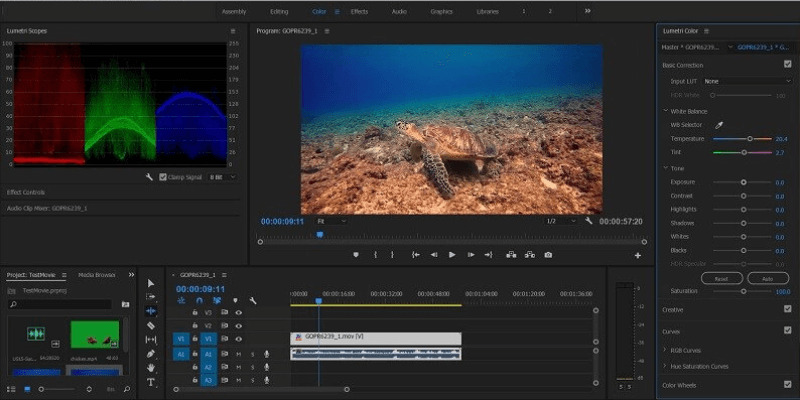
The first one to look for (which as of this writing may still be in beta) is a thing called Auto Tone. Generally, I’m not a fan of tools that feel like they could be a substitute for actually knowing the reasons and science underneath it — and in the wrong hands, Auto Tone could be like that.
That said, when used appropriately, Auto Tone can be a great start point for even experienced colorists. The Basic Lumetri settings are adjusted after an analysis of the raw clip coming into Premiere (avoid using it on top of already graded or color effected clips) — so the values can be dug into to push or reduce any particular factor of the color, be it saturation or gamma (measure of total contrast) or whatever.
For filmmakers and editors who may have just started to dabble in color, the tool is a good way to investigate why the system chose the values it did, and what happens when you adjust them. The process is obviously not meant to be destructive, so one can play around with different variations with the foundation being the thing that Auto Tone decided was “good” — or at the very least “better” than what was originally imported.
Another fancy tool in beta for Premiere Pro is something that Audition users would be familiar with, called Remix. The tool uses the Adobe Sensei AI algorithms to analyze pieces of music, and then adjust and rearrange it to conform more closely to your edited picture. I don’t want to even hazard a guess at what kind of voodoo is at play here, but it has already proven itself in Audition, and the Adobe team have migrated it over to Premiere. Having had to create VFX demo reels for the last 25 years, I am well acquainted with cutting music to picture, and I probably would have had fewer grey hairs had this tool been available!
There are also improvements that actually aren’t in beta! If you are running Premiere Pro on a Mac with an M1 chip in it, you’ll see substantial performance gains. And if you edit pieces requiring lots of text or having to conform to different world regions with different languages, graphics and text features have gotten a boost with search and replace features, universal text engine and more robust and precise graphics tools.
Website: adobe.com
Price: Adobe Premiere Elements: $69; Adobe Premiere Pro: $20.99 per month

Isotropix’s Clarisse iFX 5
Earlier in 2021, Isotropix released version 5 of Clarisse iFX, their combo layout/look dev/rendering system which has been a mainstay at DNEG for years, but has been making inroads into other VFX facilities, both large and small.
Those varying facilities may use Clarisse Builder for larger houses, and Clarisse iFX for smaller houses and individuals — but with Clarisse 5, both flavors use the same core architecture under the hood. This means not only do you get the same performance advantages, but binaries from either one can be opened in both.
Not limited to sharing between builds of Clarisse, Isotropix has done a deep dive into the USD (Universal Scene Descriptor) format and found a way to save the robust features in Clarisse, such as the scattering and distribution features that make the software so powerful, and package it into the USD format so that the scenes can be ported to other DCC programs like Houdini and Maya.
Clarisse iFX 5 includes the Autodesk Surface Shader, which means that if you were planning on rendering scenes in Arnold, as opposed to Clarisse’s internal (and extremely powerful) render engine, or perhaps you were sharing assets with a facility that wasn’t using Clarisse, the look dev you were doing on the asset would look the same.
Much of Clarisse’s new features have to do with lighting — and not just the speed of rendering, which is much faster. You can now use geometry as light sources in combination with the shaders that you’ve assigned, rather than simple emissive shaders that we are generally used to. These lights can be used as you would use geometry in Clarisse, and you can scatter them across your scene by the millions. The normal noise you would run into is mitigated by Clarisse’s Emission Importance Sampling to resolve the lighting. The combination gives you the opportunity to light without resorting to hacks and tricks.
Another huge, but not as overtly sexy, feature is using Light Path Expressions to feed light contributions only into the AOVs, rather than the image. This is beneficial when you are auditioning different lighting scenarios for a client and you want to quickly iterate in the comp as opposed to rendering completely new images for each lighting scheme.
There are hundreds of other improvements in the latest version of Clarisse iFX and all of them make for a powerful release. Yet, what impresses me most about Isotropix is its dedication to the democratization of technology and willingness to develop tools designed to play well with others rather than protecting its own ecosystem.
Website: isotropix.com
Price: Varies, from $33 to $599
Todd Sheridan Perry is an award-winning VFX supervisor and digital artist whose credits include Black Panther, Avengers: Age of Ultron and The Christmas Chronicles. You can reach him at todd@teaspoonvfx.com.


 Win a Funko X Lilo & Stitch Prize Pack!

