|
Getting your Trinity Audio player ready...
|
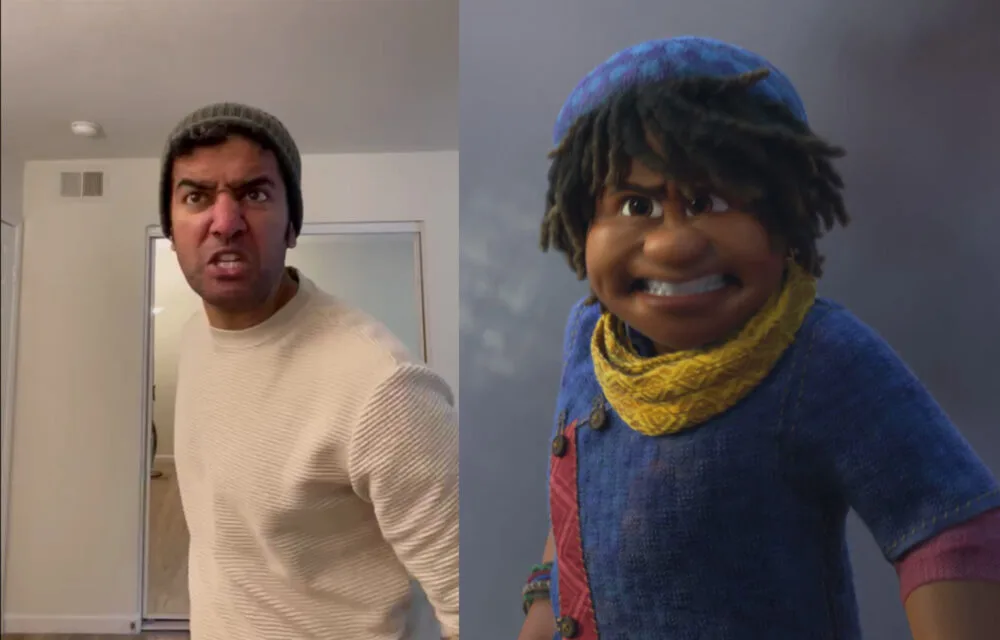
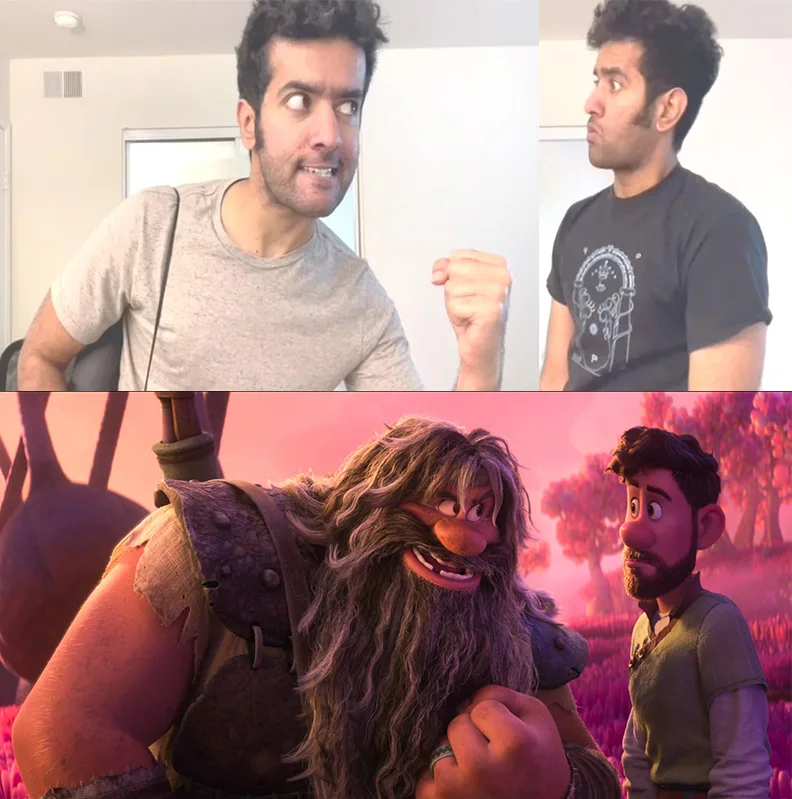
The process of using video reference is a crucial part of the planning phase in animation. Whether it is to understand the real-world physics and weight or to carefully weave in the subtle expressions in the facial performance, video reference is a key step in an animator’s shot process.
Having a successful reference mapped out can save you plenty of time during the process of your shot, as you have all the information for movement and timing (adjusted in the process). It also serves as a comprehensive guide of all your ideas so that you can get an early discussion with the directors/supervisors on how you intend to proceed in a sequence.
Below, I have explained five steps on how you can create a strong reference ready for your shots/sequences.
1. Analyzing the audio.
Before jumping right into animating a scene, it is important to listen to the audio of the scene and/or dialogs of the actor multiple times. I like to close my eyes and listen to the audio on loop and analyze three important things:
- Rhythm of the audio/dialog — This includes listening to the main accent points of the dialog and breathing. Accents can help you determine your acting choices — where you need faster/sharper motion, where you need slower/softer movement and, lastly, where you need to pause. Fast, slow and pause; these three together are essential to attain (whenever possible) a beautiful rhythm in an acting shot.
- Subtext — This is where I analyze the message behind the words of the dialog. A mistake I often see animators make is to animate solely based on the words of the dialog, whereas it is important to understand the message behind the words. Understanding the reason behind the lines will add an extra layer of complexity in the character’s thinking and thus will affect your acting choices for the sequence.
- Breathing — I also make a note of any breathing I hear or imagine where the breathing of the character will be during the dialog delivery. Whether it is panting heavily or very subtle breathing, I cannot stress enough how much life it adds in a strong character performance. Successful breathing is key to making your character believable.
2. Understanding where the character is in the sequence and in the movie.
As animators, we get our casting of shots/sequences in a film and imagine a beautiful performance to the scene given to us. However, what would make your animation look fantastic may not be the right choice for the sequence or the character’s arc in the film.
- Tracking character outside sequence — When cast a shot, I like to watch two to three sequences prior and a couple sequences after the current one to understand where the character is coming from emotionally and where they are headed. If you compare the acting choices you make without watching these other sequences vs. with watching them, I can guarantee they will differ — and, most probably, the latter will be more in sync with what the directors are chasing.
- Tracking character inside a sequence — Within a sequence, a character’s performance is headed toward some form of mini climax envisioned by the story team and the director. The character could be building to an emotional crescendo, for example. If in this case you have a scene in between, you want to make sure there is enough room for the character to reach that crescendo in the later half of the sequence. If you amp up the acting performance to the very top of the crescendo, there may be no room left for the character to have a believable acting performance, as the peak emotion placement is incorrect. Correctly identifying where your character is emotionally inside a sequence will help you make distinct acting choices that are the right fit for the story.

3. Shooting the reference and finding the right take.
This is probably my favorite part of the entire reference process. When I analyze the audio for several minutes as mentioned above, I have a certain idea of the character’s performance in the scene. However, 90% of the time it ends up being different to what I had imagined.
When I am imagining the character’s performance while analyzing audio, I have a picture of what acting choices they might make. When I do start to record videos of myself acting out the character, I always surprise myself with some natural acting choices that I did not think of. This has gotten me into a habit of recording a non-stop 15, 20 or sometimes even 30-minute video, where I perform the dialog and really try and get underneath the character’s skin. What I have noticed is after a few minutes of shooting reference, you start to throw away old ideas and some new fascinating ones come up which could be very interesting for the story. Most of my acting choices are usually from the last few takes.
There are three important things to keep in mind when recording video:
- Matching the camera angle as much as possible — Sometimes there is a reference shot that is not matching the 3D camera in your Maya scene. This might make it hard to get the right body mechanics for your scene as the character’s placement will not match up to that of your acting. Having the right camera angle is a great foundation to have. What can make your mechanics stronger is to have another camera recording a different angle, to help you out in case your main camera cannot provide all necessary information.
- Shooting a closeup to capture facial details — Sometimes the camera angle of our shot is such that we are not able to get all the necessary facial expressions and subtle emotions captured correctly. In this case, I record the body as I would normally but also do an additional take where I am closer to the camera and my face is clearly readable. This can help a lot when you are headed toward polish and need closeup facial reference.
- Expanding your cast list — Don’t be afraid to ask a colleague or a family member to act out a character that is very different from you. For example, I could always try and do an acting performance for a female character but it would probably be better off if performed by a girl. There are certain mannerisms and body posture/movement that come instinctively to them, and they can bring a more natural performance for that particular acting piece.

4. Importing into Maya and adjusting timing.
After you are done cutting up your reference and are happy with your take, you can import the reference into Maya either using a camera image plane or a poly surface plane and then applying image texture onto that. I prefer the former.
I always adjust the timing at this stage. Remember the fast, slow and pause moments in the scene? This is where I would take my existing video reference and adjust the timing of the character to make sure they are hitting the right accents, pausing for the right moments or slow down the reference to really let the audience register a particular action. All of this can be easily adjusted using the attribute editor of the image plane, specifically the “file extension” channel. You can also use this tool to take away frames or hold some frames to achieve an interesting rhythm in the shot.
5. Animate.
After you are ready with your complete acting take that has a rhythm that you like, you can start to block out the extreme poses, then key storytelling poses and so on. In my case, if there ever is a need to shoot more references, I quickly record a video and stitch it to my existing reference. I find that it is a faster way for me to get more naturalistic acting and a successful character performance.
Happy animating!

Chatrasal Singh is currently based in Burbank, California and is a senior animator at Walt Disney Animation Studios. With over 15 years of experience in feature film-quality character animation, Singh’s career spans studios such as DreamWorks, Wētā, Animal Logic and Base FX. His credits include Netflix’s Wishdragon, Sony’s Peter Rabbit 2, Warner Bros.’ DC League of Super-Pets and Disney’s Strange World.


 Win a Funko X Lilo & Stitch Prize Pack!

